User Documentation - Getting Started
This tutorial will walk you through the collectives app in less than 10 minutes. It assumes you already have a user account on a nextcloud installation with the collectives app enabled.
✨ Create a new collective
Visit the collectives app by clicking its icon in the toolbar at the top of the screen:

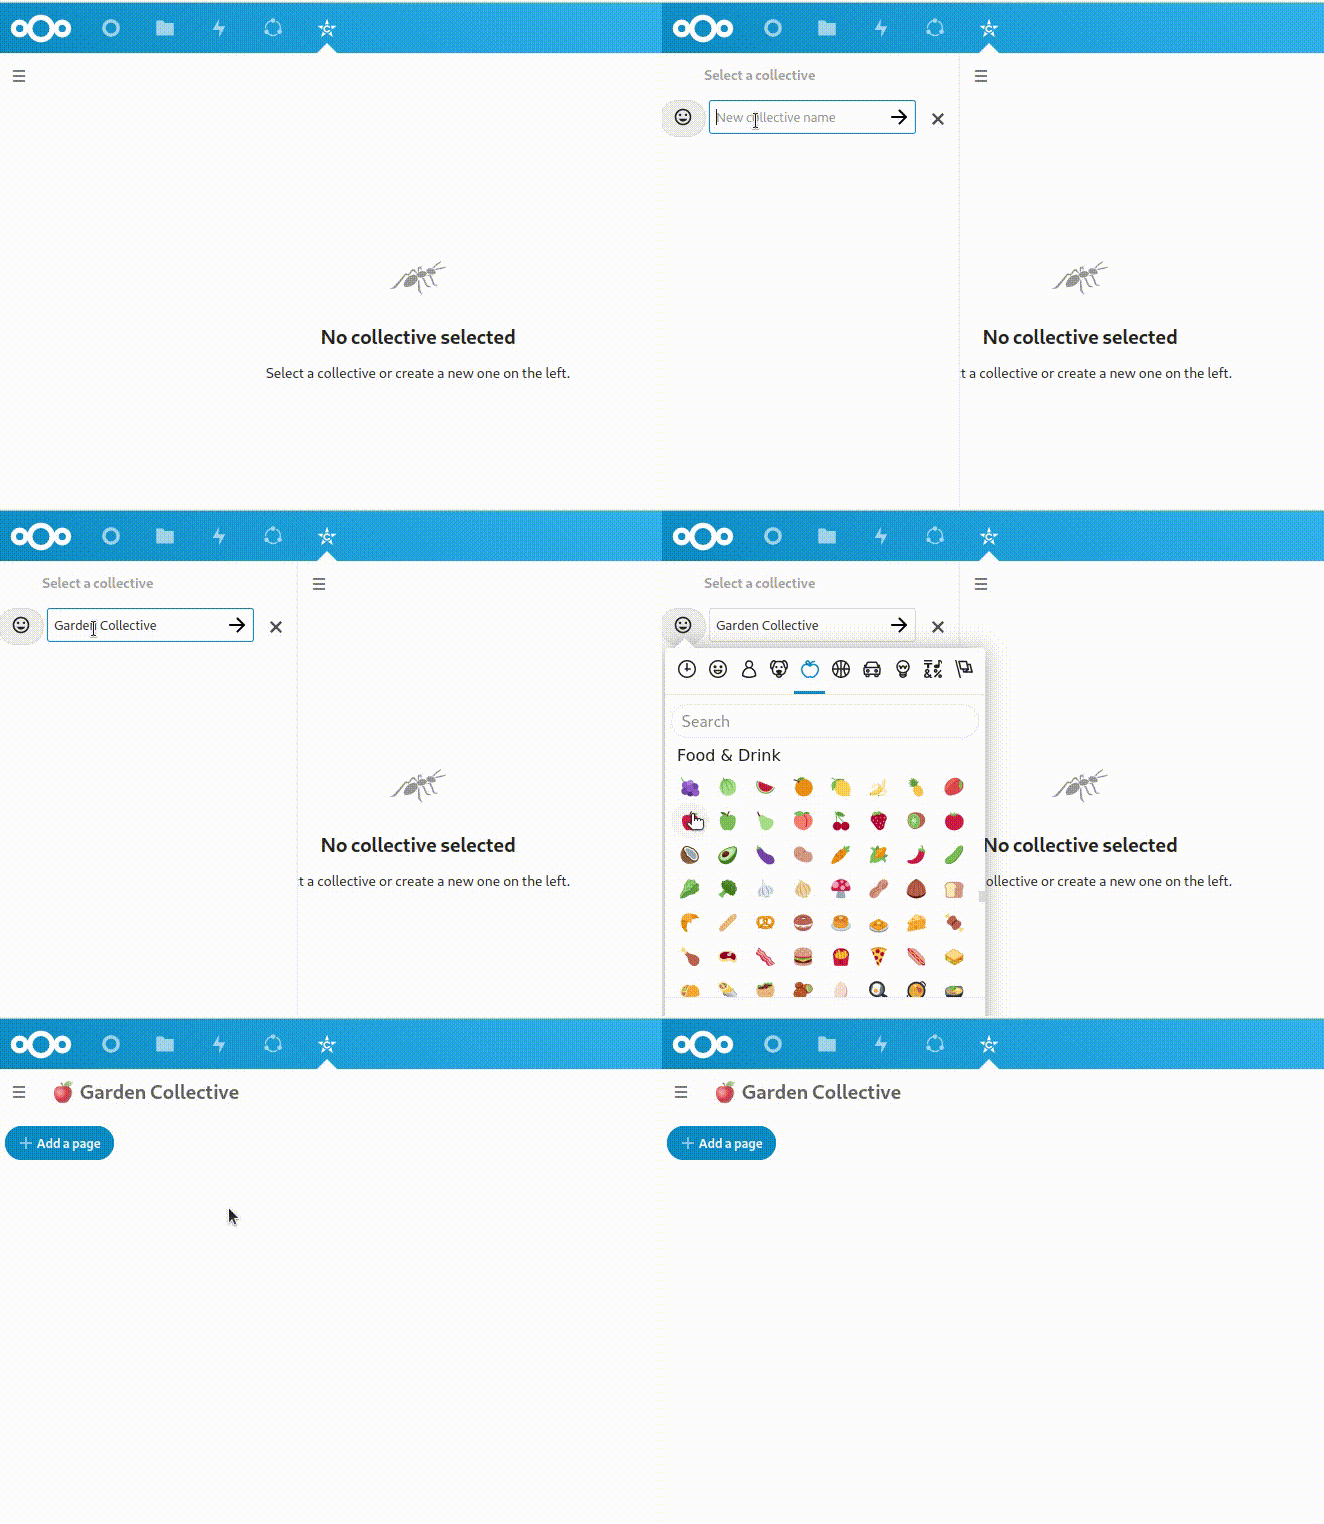
On the left of the screen you will find a list of all of your collectives. It’s probably empty if you have not been added to any yet. Click “Create new collective” and type a name for your collective. You can also pick an emoji to easily find your collective later:

🌱 Bring life to your collective
Create pages and share the knowledge that really matters.
Click the “Create a Page” button in the upper left and a new page will appear.
You can type in a title right away or add some content first and settle on a title later.
🛋️ Edit the landing page to feel like home
When you create a new collective, it will start with some initial content. Push the pencil button on the top left of the start page ↗️ to adjust it to your collectives needs.
🐾 Add your comrades to the collective
Follow the “manage members” link that you find in the action menu inside the collectives list on the left to manage members.
If your Nextcloud instance is configured to allow groups in teams you can even add entire groups to your collectives.
Also good to know
- Multiple people can edit the same page simultaneously.
- Link local pages by selecting text and choosing “link file”. Drag & drop from page list into the editor also works.
- Add templates for future subpages (“Show templates” -> “Add template for subpages”)
- Ask the community for help in case of questions.
Searching Collectives
Use the search input on top of the page list (top left) to filter your collecives by page titles. Use the Nextcloud unified search (top right) to search within the contents of Collectives.